How to Manage Products with Categories
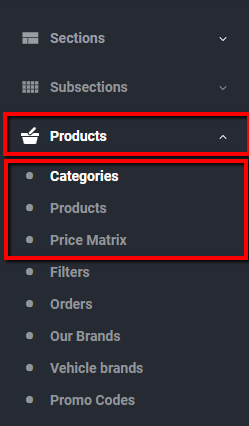
 For e-commerce websites, all the product information can be found under the “Products” tab in the left navigation menu. For each client, the product options will be customized based on the business-specific needs, but the are are certain common features.
Managing Product Categories
- Select the “Categories” subtab under the “Products” tab in the left menu. The list of categories will open up on the right.
- With the category list, you have the following options:
- Add a new category by clicking on the “Add New” button;
- Delete a category by selecting it and clicking on the “Delete Selected” button;
- Manage an existing category by clicking on the “Details” icon next to the category information.

- Once you click on either “Add New” or “Details”, the category information window will open up.
- Enter the category name in the “Name” tab.
- Using the dropdown menus, select whether the category belongs to any parent category, and whether it has children.
- Click on the “Choose File” button to select the category thumbnail.
- Enter the category description in the corresponding box, if applicable.

- Click on the “Show Meta Tags” button at the bottom.
- Enter Meta Title, Meta URL, and Meta Description in the corresponding text boxes.
- Click on “Save” or “Save and Close” at the bottom to save your changes.
Managing Products
- Click on the “Products” subtab under the“Manage Products” tub in the left navigation menu to open up the product list with corresponding prices on the right.

- As before, you can either add a new product (“Add New”), delete a product (“Delete Selected”), or edit an existing one (“Details” icon).
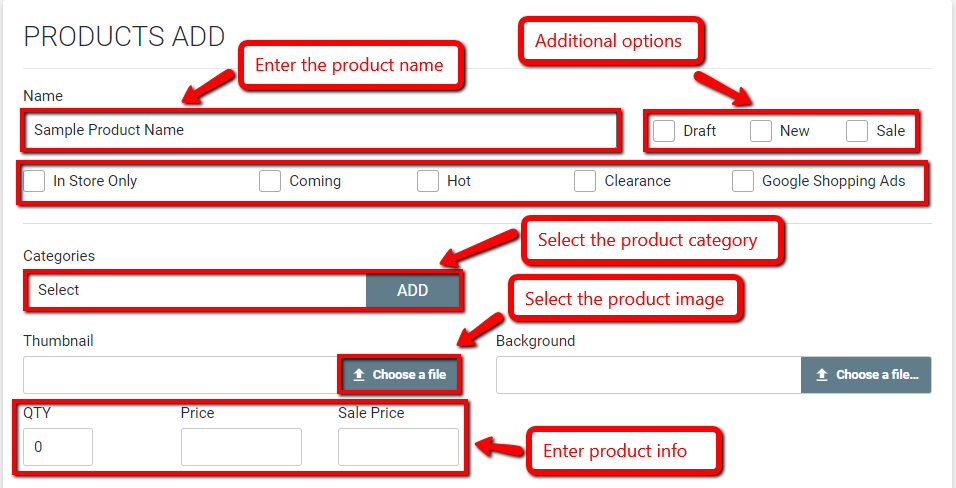
- Click on either “Add New” or “Details” to open up the product information window.
- Enter the product name in the “Name” tab.
- Using the dropdown menu, select what category the product belongs to.
- Click on the “Choose File” button to choose the product photo.
- Enter the product description in the “Description” box, if applicable.

- Click on the “Show Meta Tags” button at the bottom.
- Enter the product information: quantity available, price, sale price, etc.
- Fill out any additional required information.
- Click on “Show Meta Tags” button at the bottom.
- Enter Meta URL, Meta Title, and Meta Description in the corresponding boxes.
- Click on either “Save” or “Save and Close” buttons to save the changes.
Price Matrix
The product prices and inventory can be managed from the “Price Matrix” window.
- Click on the “Price Matrix” subtab under the “Products” tab in the left navigation menu to open up the matrix on the right.
- The price matrix contains the list of products with the corresponding prices and the quantity available. You can easily change the information by simply entering it in the corresponding boxes.
- You can print out or download the list by clicking on the icons at the top of the list.

Search How-To's:
We found 3 similar questions:


 For e-commerce websites, all the product information can be found under the “Products” tab in the left navigation menu. For each client, the product options will be customized based on the business-specific needs, but the are are certain common features.


