How to Add New Subsections
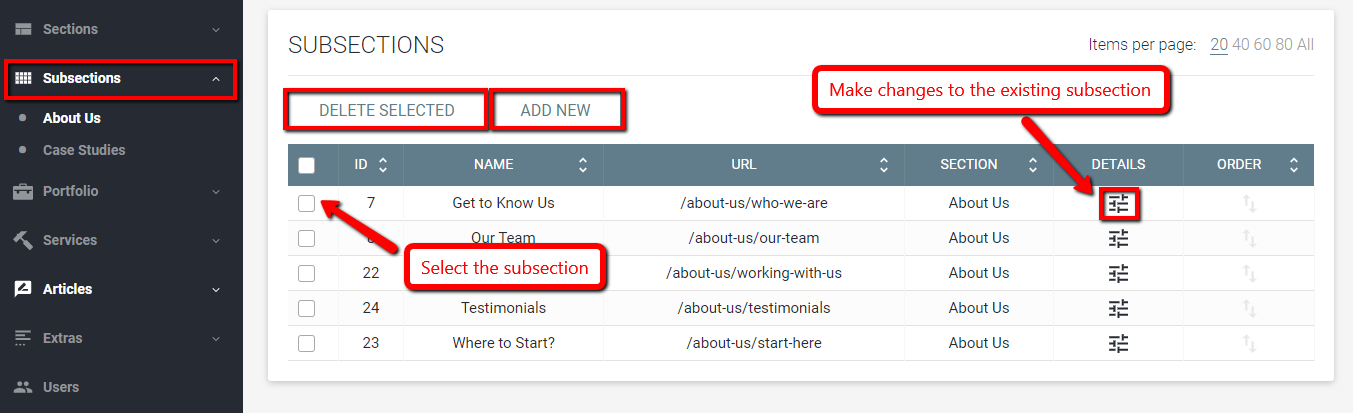
Whenever you wish to add a new subsection to the website, simply navigate to the corresponding tab in the left navigation menu. The list of existing pages will appear on the right. Click on the “Add New” button at the top of the list, and the editor will open up. Likewise, you could select an already existent page, and click on the “Details” icon to the right of it to make changes to the page.
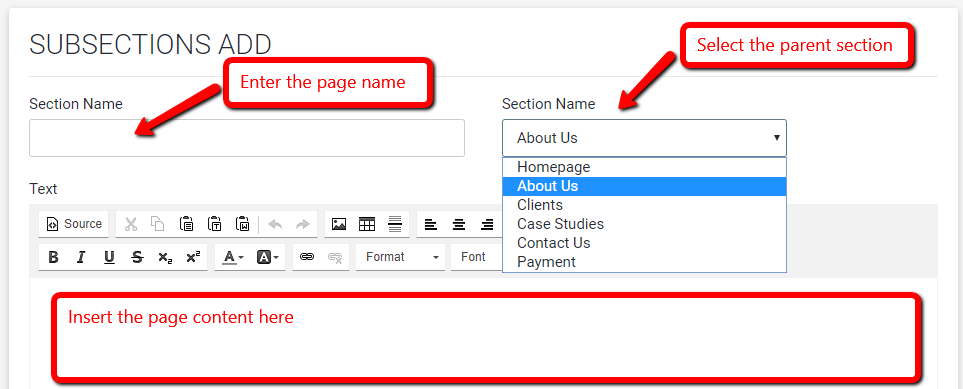
- Enter the page name in the “Name” or “Title” box at the top.
- Next, use the “Section” drop down menu to assign the subsection to a parent section.
- Often, you will have an option to add a “Featured Image” or a “Thumbnail” either at the top or at the bottom of the editor.
- Some subsections or services have a “Short Description” text box. Enter the short summary of the page there.
- Insert the full page content into the main “Content” box of the editor.
- Every page of an SEO-optimized website requires proper meta tags. With JuiceBox, adding meta tags is simple! Click on “Show Meta Tags” button under the main box of the editor. The Google snippet preview will appear on the right.
- In the “Meta URL” box, you can enter the URL for your new page. The good practice is to use the name of the page and simply replace all the spaces with hyphens (“-”). Also, drop all of the common stop words, such as “a”, “the”, “if”, “on”, etc.
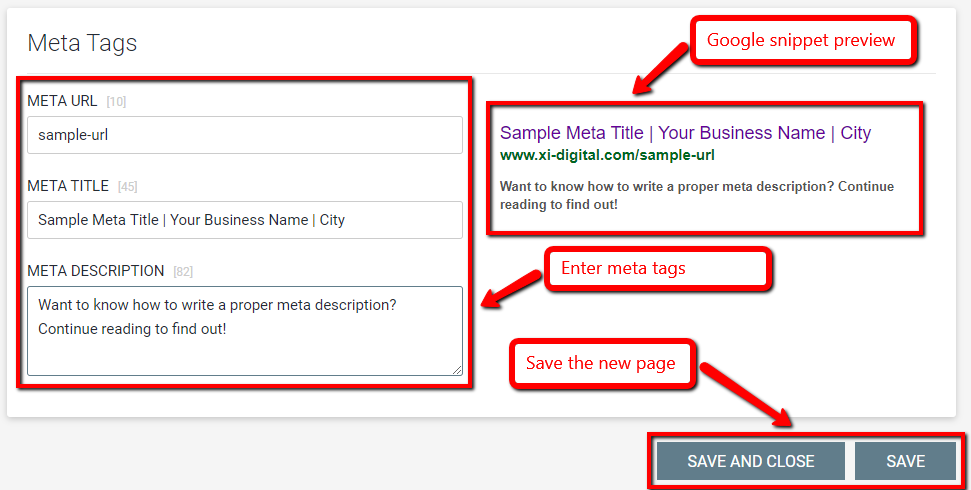
- Enter the meta title in the corresponding box. Ideally, it should be between 55 and 65 characters in length. If the page title is too short, you can add additional words to the meta title, such as your company name or location.
- In the "Meta Description" box, enter the short description of what your page is about. Make sure all the words from the meta title are included in the description, and the length is between 140 and 160 characters. A good practice is to include a “call to action”, such as “learn more…”, “continue reading…”, etc.
- Click on “Save” or “Save and Close” button at the bottom - the new page has been successfully added to the site!
Search How-To's:
We found 3 similar questions:
